
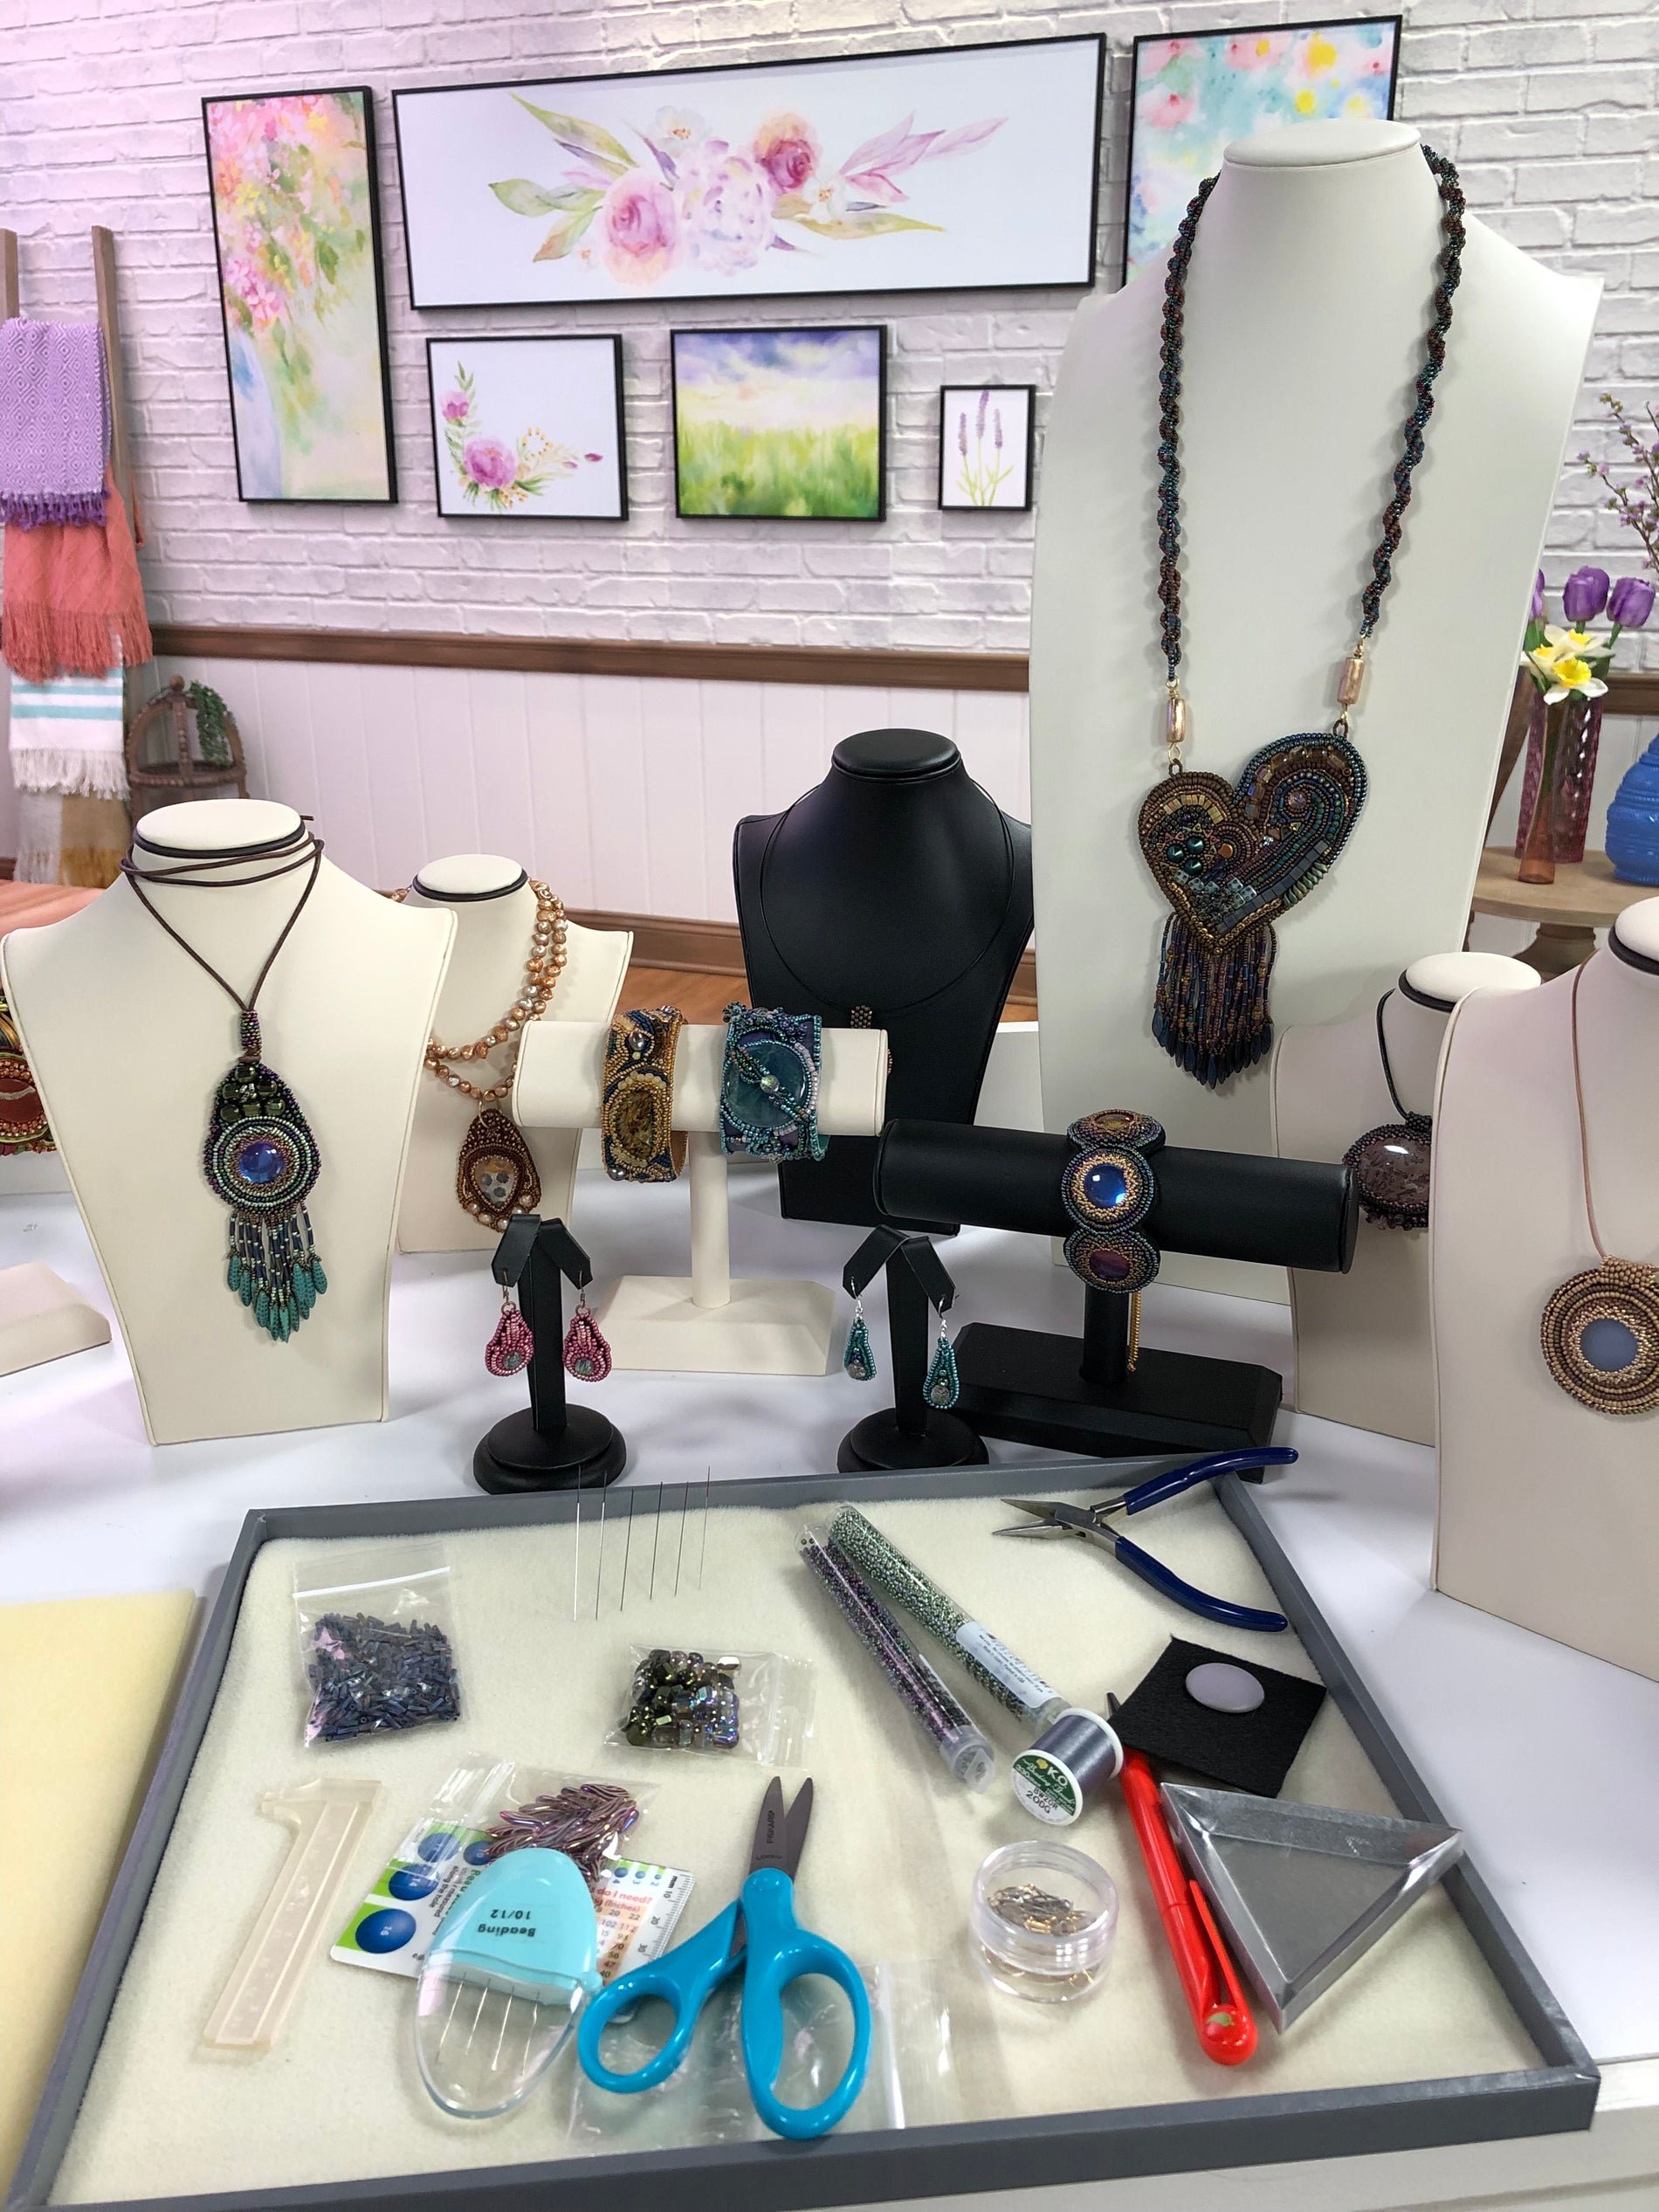
Essential Stuff for Bead Stitching
Gail DeLuca January 19, 2024Read on for info on bead stitching essentials. You might just pick up a tip or two!
Adding Thread
Fireline and S-Lon Fire: I love this technique for its ease of adding thread, and having no tails to weave in when adding.
- Use a lighter or thread burner to melt the end of the old thread and the end of the new thread.
- Tie the two ends together into a square knot, pulling the knot firm but not tight, leaving several inches of tail on each side.
- Pull both threads until the melted ends come together at the knot and neither pulls through. You should now have a knot small enough to pass through the beads.
- Thread your needle and continue stitching!
If using K.O. thread, or One-G or Nymo, the following one is quick, easy and secure.
- When your thread gets down to about 6” (to estimate it, think of the length of a dollar bill), remove the needle and cut a new length of thread.
- Tie a slip knot in one end of the new thread, make the loop small and leave at least a 6” tail. [watch this short video for a slip knot demonstration https://www.youtube.com/watch?v=m7l36e6pwQQ]
- Thread the old thread through the loop in the slip knot, placing the loop next to the bead, and tighten the slip knot around the old thread. You should hear and/or feel a distinct snap as the knot tightens. Tug on the threads to test the not and make sure it holds.
- Thread a needle on the new thread and continue stitching.
- After you have added several rows of stitching, or at the end of your project, make sure to weave in the two tails to secure.
- Be sure to watch this short video for a slip knot demonstration https://www.youtube.com/watch?v=m7l36e6pwQQ
Threading a needle
Prep the thread: For Fireline and S-Lon Fire, smash the end of the thread to flatten it enough to pass through the needle. For K.O., One-G, and Nymo lightly wax the end of the thread with beeswax.
If you are right handed, hold the thread in your left hand between thumb and forefinger, and with your right hand bring the needle to the thread.
Watch our youtube video here: https://www.youtube.com/watch?v=LISTCG7S2Dw
Adding a Clasp
There are lots of ways to add clasps, but all methods include the same basic concepts:
- Clasps are a stress point in any beadwork. Always reinforce the stitches you use to attach a clasp.
- Inspect your clasp for sharp edges or burrs where your thread will pass through it. Use a bead reamer or file if needed to smooth any rough spots.
- Protect your thread with beads.
- Use soldered jump rings, oval jump rings or split rings (the ones that look like tiny key rings). Avoid round jump rings - the thread can slip through the opening.
Weaving in Thread
When you finish your beadwork, and when you need to get rid of the tails when you add new thread, you should always weave the tails into your beadwork to secure the ends of the thread. You don’t need to weave in the entire length of thread, just enough to keep it from coming undone.
- Make sure to stitch through each bead in your path - if you skip a bead, thread will show.
- Pay careful attention to your thread tension - pulling too tight may distort the stitching you have already done.
- Stitch in different directions - up, down, around. Avoid a straight path, which will pull out easier.
Softer Threads: Nymo, K.O., C-Lon, One-G.
These are all nylon thread and come in a variety of sizes and colors. Nymo in particular comes in sizes: 000, 00, 0, A, B, C, D, E, F, and G, with 000 being the thinnest and G being the thickest. (The most commonly used sizes in beading are B and D.) These threads are great for most purposes, and are the best for making your fringing hang softly as well as color matching to your beads.
Stiffer Threads: Fireline, S-Lon Fire
Fireline and S-Lon Fire are strong braided threads with no stretch and make a good choice for sharp-edged beads like bugles or crystals, or anywhere you want a little more stiffness. Fireline and S-Lon Fire come in many sizes, and the most popular for seed bead stitching are 4lb, 6lb and 8lb. These come in limited colors like smoke and crystal (white).
Through experience and trial and error, you will come to find your own favorite for each time of bead you work with and project you do.
Thread Waxes and Conditioners
Waxes and conditioners both help prevent fraying in your thread. Synthetic and natural beeswax also protect and coat your thread as well as helping with your tension.
Needles
Beading needles have a very narrow eye to allow for a bead to slide over it. The most common sizes of needles are 10, 12 and 13; the smaller the number, the larger the needle. Needles may start to curve over time from use and will need to be replaced. If you are making multiple passes through a bead or using different sizes of beads in your project, you may need to switch to a smaller needle while you work.
Beads
Seed beads are made of glass and sometimes have either linings or finishes on top of the glass.
Seed beads are made in a variety of countries by a variety of manufacturers. There is little standardization; therefore, colors sizes, and characteristics vary widely. Sizes range from 3° to 24°. The larger the number, the smaller the bead. Even these sizes vary from one maker to the next. You will find that an 11° Delica has a large hole and is a small bead compared to a different kind of Japanese 11° or a Czech 11°. It’s important to keep these differences in mind, and if you have a project with a specific supply list, any substitutions maybe require adjustments.
Seed bead shapes range from triangles to cubes to donuts to hex. Currently there is a trend in multiple hole shapes and complicated shapes, and it seems like we learn about a new bead or more every month! Some beads are faceted once (called Charlottes) or multiple times (called three-cut), giving them added sparkle.
Finishes and colors are mostly permanent in quality beads, but be aware that dyed beads or metallic finishes may wear off under heavy use, and some may change color after prolonged exposure to UV light. Delicas have a wear chart available which shows colors requiring special care. Newer coatings such as Duracoat from Miyuki or Permanent Finish from Toho are a coating applied over the metallic finishes to enhance the wearability of the finish.